
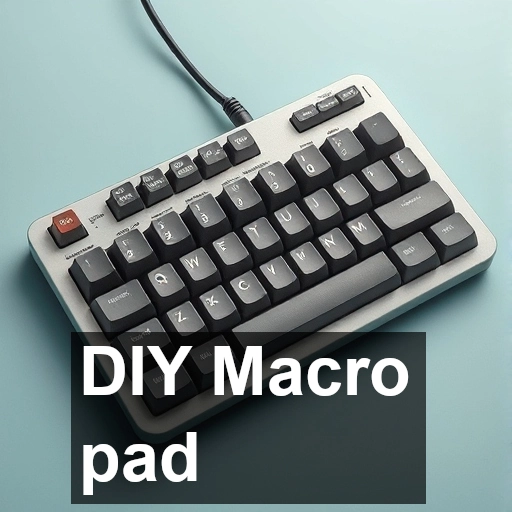
In the realm of productivity and gaming, macro pads have emerged as versatile tools that can enhance workflow and provide quick access to commands. With the Raspberry Pi Pico, a compact microcontroller board, creating your own custom macro pad is an exciting and rewarding project. This article will guide you through the process of designing and programming a macro pad using the Raspberry Pi Pico.
What is a Macro Pad?
A macro pad is a small keyboard with programmable keys that can be configured to perform specific functions, like executing keyboard shortcuts, launching applications, or controlling media playback. Unlike a standard keyboard, a macro pad often focuses on a few customizable keys tailored to the user’s specific needs, making it ideal for gamers, content creators, and professionals alike.
Why Use Raspberry Pi Pico?
The main selling point of pi pico is the circuit python. The circuit python has native support for hid keyboard and mouse emulation . You just need the import the hid library in your main.py or code.py.
Components Needed
To build your macro pad, you will need the following components:
- Raspberry Pi Pico
- Key switches (mechanical switches are recommended)
- Keycaps (to fit the switches)
- Breadboard or custom PCB (for assembling components)
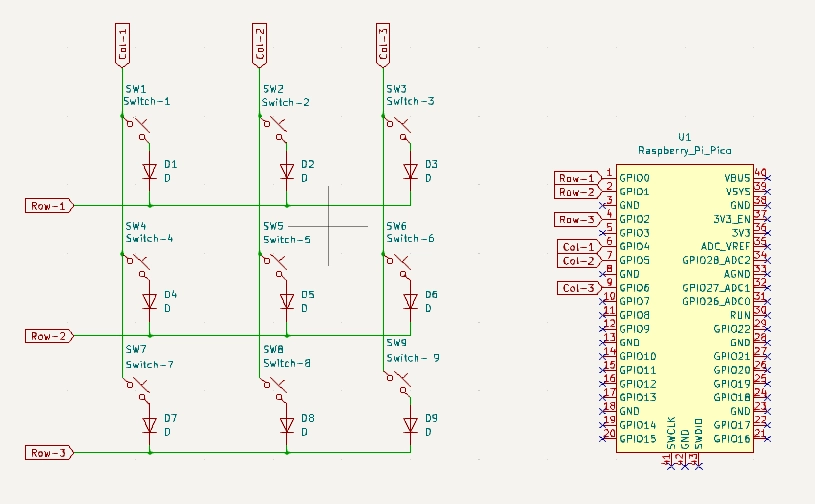
- Diodes (if you want to connect switches in a matrix)
Circuit connection :
Code
For this project i will be using kmk library . To install the library simply clone this repo https://github.com/KMKfw/kmk_firmware/tree/main and copy the kmk folder to your circuit python drive of pi pico .
import board

from kmk.kmk_keyboard import KMKKeyboard
from kmk.keys import KC
from kmk.scanners import DiodeOrientation
from kmk.modules.macros import Macros , Tap , Delay , Press , Release

keyboard = KMKKeyboard()
macros = Macros()
keyboard.modules.append(macros)
keyboard.modules.append(layers)

# diodes are at columns
keybThoard.row_pins = (board.GP0, board.GP1, board.GP2)
keyboard.col_pins = (board.GP4, board.GP5, board.GP6)
keyboard.diode_orientation = DiodeOrientation.COL2ROW

# Macros

COPPERPOUR = KC.LCTL(KC.LSHIFT(KC.Z))
RULER = KC.LCTL(KC.LSHIFT(KC.M))
MEASURE = KC.LCTL(KC.LSHIFT(KC.H))
CLOSE3D = KC.LCTL(KC.W)
THREED = KC.LALT(KC.M)

keyboard.keymap = [
    [      # Base layer
           KC.PGDN,KC.PGUP,RULER,
           COPPERPOUR,CLOSE3D, THREED,
           BASE,MEASURE, KC.GRAVE,
    ]
]

if __name__ == '__main__':
    keyboard.go()
Explanation :
- In this we first start by importing the kmk libraries .
- Then we create an object of KMKKeyboard class and assign the pins connected to the columns and rows of the keyboard matrix
- Now sets the orientation of the diodes used in the matrix, indicating how the key presses will be read.
- After all this, Create the custom keys/macros .
- e.g. THREED = KC.LALT(KC.M) = Means Tap “Alt + m”
- At the end assign you custom actions as per you switch matrix.
Conclusion
Building a macro pad with the Raspberry Pi Pico is an excellent way to enhance your productivity and customize your computing experience. With its affordable price and flexibility, the Pico makes it easy for both beginners and seasoned makers to create a tailored device that meets their needs. Experiment with different layouts, features, and programming options to make your macro pad truly your own.
As you embark on this project, remember that the possibilities are endless. Whether you’re streamlining your workflow or optimising your gaming setup, a custom macro pad can be a game-changer! Happy building!