

In today’s digital landscape, where online privacy and security are critical, Virtual Private Networks (VPNs) have become indispensable for safeguarding your internet traffic. Among the numerous VPN protocols available, WireGuard stands out for its efficiency, speed, and robust security features. This article will provide a comprehensive guide to setting up WireGuard on a Linux machine, ensuring your online activities remain private and secure.
What is WireGuard?
WireGuard is a modern VPN protocol that aims to provide a more efficient and secure alternative to traditional VPN protocols like OpenVPN and IPsec. It uses state-of-the-art cryptography, resulting in a lightweight and fast solution with a smaller codebase, making it easier to audit and maintain. WireGuard operates at the kernel level, which contributes to its high performance and low latency.
Key Features of WireGuard
- Simplicity: WireGuard’s configuration is straightforward and easy to understand.
- Speed: With its efficient design, WireGuard provides better performance compared to many other VPN solutions.
- Security: WireGuard uses modern cryptographic techniques, ensuring robust security for your data.
- Cross-Platform: WireGuard is available on various operating systems, including Linux, Windows, macOS, iOS, and Android.
Setting up wireguard
Traditionally, configuring WireGuard can be complex and cumbersome. However, Docker simplifies this process significantly. We will utilize the “WireGuard Easy” image to set up our WireGuard installation.
Prerequisites
Before you begin, ensure that you have:
- A Linux server (Ubuntu/debian, Arch, or another distribution) with root access.
- Basic knowledge of the command line.
- A firewall configured to allow VPN traffic (UDP port 51820 is the default).
Installing Docker
In this article we will be using ubuntu/debian based server.
We will begin by updating the Ubuntu server, followed by installing Docker.
## Add Docker's official GPG key:
sudo apt-get update
sudo apt-get install ca-certificates curl
sudo install -m 0755 -d /etc/apt/keyrings
sudo curl -fsSL https://download.docker.com/linux/ubuntu/gpg -o /etc/apt/keyrings/docker.asc
sudo chmod a+r /etc/apt/keyrings/docker.asc

# Add the repository to Apt sources:
echo \
  "deb [arch=$(dpkg --print-architecture) signed-by=/etc/apt/keyrings/docker.asc] https://download.docker.com/linux/ubuntu \
  $(. /etc/os-release && echo "$VERSION_CODENAME") stable" | \
  sudo tee /etc/apt/sources.list.d/docker.list > /dev/null
sudo apt-get update

sudo apt-get install docker-ce docker-ce-cli containerd.io docker-buildx-plugin docker-compose-plugiOnce you have Docker installed, you will want to add your current user to the “docker” group. Adding your user to this group will allow you to stop and start the WireGuard Docker container without having to utilize the super user.
sudo usermod -aG docker $USEROnce you’ve completed this step, log out of your server and then log back in.
Installing WireGuard Easy
Now that we have Docker installed, let’s proceed with setting up the WireGuard Easy image.We will use docker compose file for this with the following content.
services:
  wg-easy:
    image: ghcr.io/wg-easy/wg-easy:15
    container_name: wg-easy
    networks:
      wg:
        ipv4_address: 10.42.42.42
        ipv6_address: fdcc:ad94:bacf:61a3::2a
      nproxy_network: {}
    volumes:
      - etc_wireguard:/etc/wireguard
      - /lib/modules:/lib/modules:ro
    ports:
      - "51820:51820/udp"      # WireGuard port (don't proxy this)
      - "51821:51821/tcp"      # Web UI port (we'll proxy this)
    restart: unless-stopped
    cap_add:
      - NET_ADMIN
      - SYS_MODULE
    sysctls:
      - net.ipv4.ip_forward=1
      - net.ipv4.conf.all.src_valid_mark=1
      - net.ipv6.conf.all.disable_ipv6=0
      - net.ipv6.conf.all.forwarding=1
      - net.ipv6.conf.default.forwarding=1

volumes:
  etc_wireguard:

networks:
  wg:
    driver: bridge
    enable_ipv6: true
    ipam:
      driver: default
      config:
        - subnet: 10.42.42.0/24
        - subnet: fdcc:ad94:bacf:61a3::/64

  nproxy_network:
external: trueTo get our VPN up and running, we need to start the container by
docker compose up -dAccessing your Wireguard Easy Web Interface
The web interface provided by “WireGuard Easy” can be accessed at port 51821 of your server.
http://<IPADDRESS/Domain-name>:51821You should now see the following screen asking you to log in to the WG-Easy web interface.
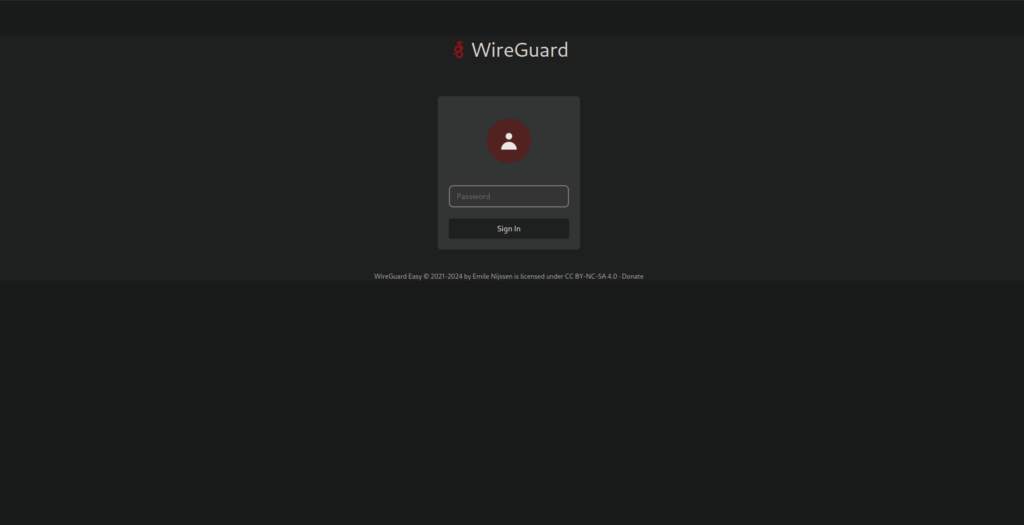
Now, you must type in the password you set earlier in this guide
Creating client
Once you are logged in, you can create your first client for your WireGuard VPN. by clicking “+New” button.
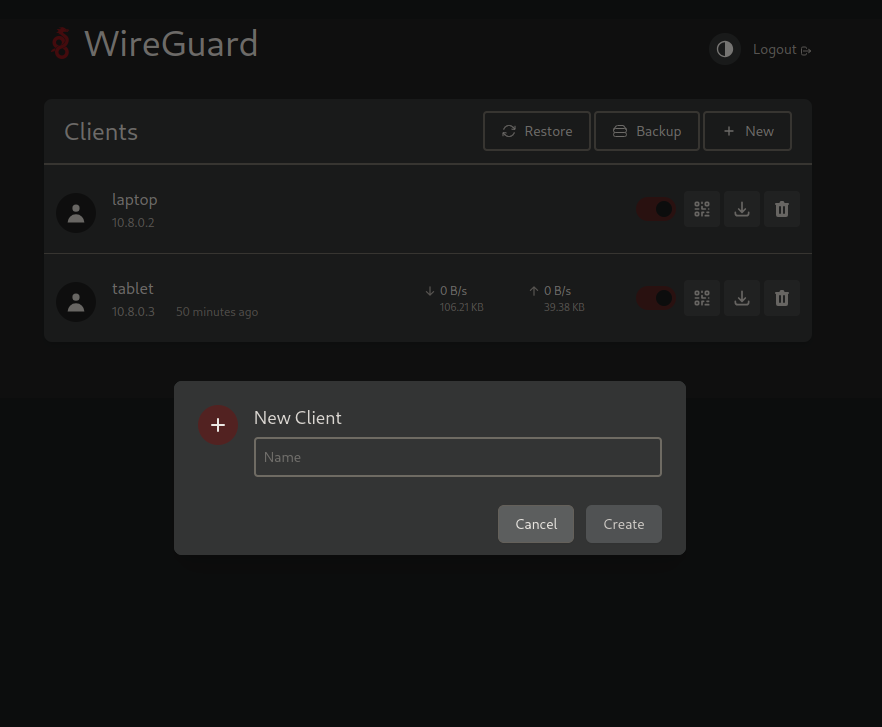
After creating a client, you’ll receive a QR code and a configuration file. These can be used with WireGuard client tools to connect to your WireGuard server.
Testing wireguard
To test our WireGuard setup, we will use two devices: an Android tablet and a laptop running Ubuntu Linux. First, we’ll create two separate WireGuard client configurations—one for the tablet and another for the laptop.
On Android Tablet
Install wireguard app form the playstore that you can find here
Next, we will scan the QR code generated by WireGuard when creating the client configuration.
To obtain the QR code, simply click the QR code button, as illustrated below.
Now that we have the QR code, we need to integrate it into our WireGuard Android app. To do this, open the WireGuard app on your device, tap the “Add” button, and then select the “Scan QR Code” option
After scanning the QR code, you’ll be prompted to give the tunnel a name—choose any name you prefer. To connect to the WireGuard server, simply toggle the switch next to the tunnel you created earlier.
On linux pc
Installing wireguard tools
On Linux, you will need to install the wireguard-tools package to connect to the WireGuard server.
on ubuntu/debian
sudo apt install wireguard-toolson Archlinux
sudo pacman -S wireguard-toolsWireguard config file
To connect to a WireGuard server using the wireguard-tools, you’ll need the corresponding configuration file. This file can be generated via the WireGuard Easy Server GUI. For each client, WireGuard creates a separate configuration file. To download the configuration for a specific client, simply click the download icon next to the client you’ve previously created.
Start the WireGuard Tunnel Using the Config File
To bring up the WireGuard tunnel using the .conf file, use the following command:
sudo wg-quick up /etc/wireguard/configfile.conf
# To verify

sudo wgTo Bring the Tunnel Down
When you’re done, you can disconnect the WireGuard tunnel by running:
sudo wg-quick down /etc/wireguard/configfile.confConclusion
Setting up WireGuard with Docker Compose provides an efficient and manageable way to deploy your VPN server. By following this guide, you should have a functional WireGuard server running in a Docker container, ready to secure your online activities. If you have any questions or run into issues, feel free to ask.
This article was super interesting and helpful.